Help Center
Download
Depending on your immediate need for the downloaded files you have several options to choose from.No need to download multiple hi-res files if today if you only want to use them for placeholders or for a screen presentation.
First select the files that you wish to download. This is the perfect place for you to gather, sort, review and if you like change until you have the files you need.
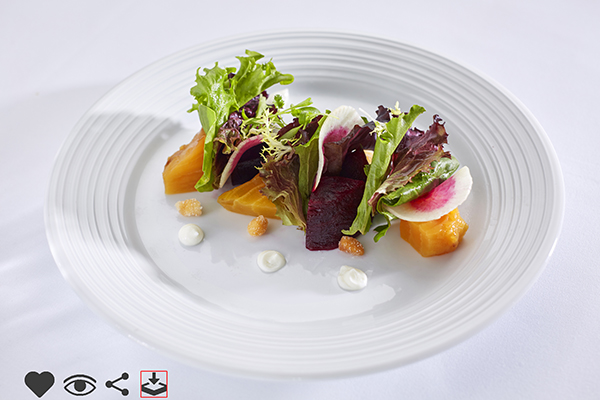
Files can be downloaded by clicking on the download icon in the thumbnail.
To download multiple files, select the files you wish to download by clicking the checkmark in their thumbnails.

After selecting the files, click the download icon in the upper right corner.

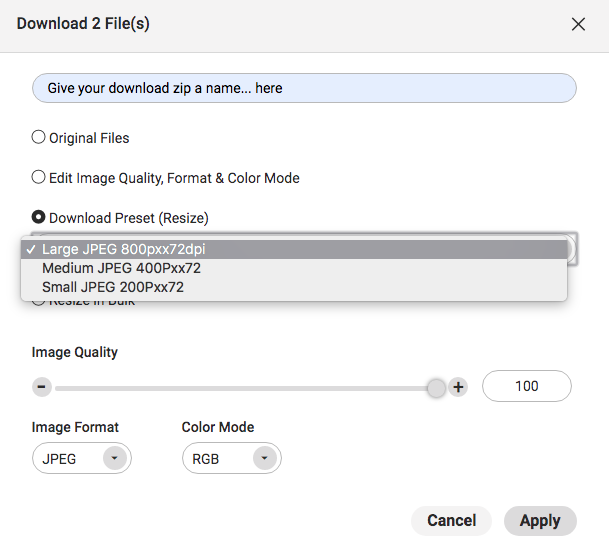
Download options
Original (default):This is the best file that is available and has the original programs suffix at the end of the name. i.e. but not limited to could be. .psd (Photoshop) .eps (Encapsulated Postscript file) or .ai (Illustrator Drawing) .mov (Quick Time Movie) in which it was created. Generally, these would be industry standard file sizes ideal for high quality print or video production.
The following 72dpi file formats are only ideal for very quick downloads. Its main purpose is for screen views or place holders only. Not for reproduction nor high quality printing.
Large JPEG 800Px x 72dpi
Ideal to download if all you need are going to be for an on-screen presentation such as in PowerPoint, Keynote or if you only need to place the file into a desktop publishing program. As a very general guide an 800Px x 72 dpi will give you a full screen image in PowerPoint or Keynote.
Medium JPEG 400Px x 72dpi
Ideal to download if all you need are going to be for an on screen presentation such as in PowerPoint, Keynote or if you only need to place the file into a desktop publishing program. As a very general guide an 400Px x 72 dpi will give you a 1/2 screen image in PowerPoint or KeyNote.
Small JPEG 200Px x 72dpi
Ideal to download if all you needs are going to be for an on screen presentation such as in PowerPoint, KeyNote or if you only need to place the file into a desktop publishing program. As a very general guide an 200Px x 72 dpi will give you a 1/4 screen image in PowerPoint or KeyNote.
Extra large PNG 800Px x 72dpi (Portable Network Graphics... pronounced PiNG)
Ideal to download when you wish to add a .eps logo graphic to a desktop presentation program and require your logo to have a transparent background. Not for professional-quality print graphics.
If images are not downloading, make sure to enable Pop-ups on your browser this will allow zip folders to be downloaded.
On Google Chrome, look above at the far right of the search bar for a pop up icon and select 'always allow':
On MozillaFirefox, look above at the yellow preference bar and select 'allow pop -ups':
On Safari, click on Safari --> Preferences --> Privacy and then select 'Allow current website only':
For all other Internet browsers, you will have to undergo a similar process to allow zip folders to be downloaded.
Icons
Clicking on one of these icons will allow you to perform a new action. Hover over each Icon to see what it does. Click a 2nd time to release your selection.
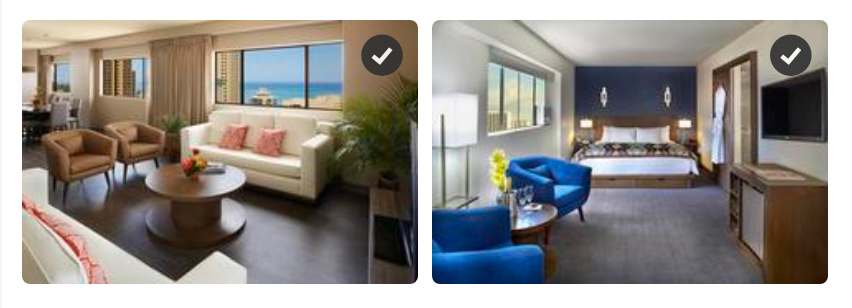
Hover over the right hand corner of a file thumbnail and click the checkmark. Selected files will display a white colored checkmark in a black circle and non-selected files will not. You can also quickly select ALL files in the interface by clicking the ‘Select All’ icon.
NOTE:
This only appears after selecting an asset. To cancel your file selection, either unselect the files or hit the Escape key.
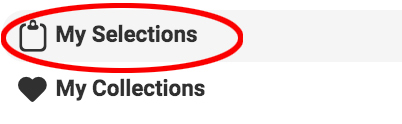
The My Selections feature in Razzbonic allow you to gather and add assets to a temporary clipboard style location from which you can then Share files.
Share:
You can choose to send your selected files in TWO convienent ways.

Files can be shared by Email
Files can be shared by EmailFirst select the file or files that you wish to share.You can access the share window by clicking the Share button.
Click the email icon in the share window.

Files can also be shared via a Link
Files can also be shared via a Link
To share files with external users without using email, use a Link. First select the file or files that you wish to share.You can access the share window by clicking the Share button.
The link option appears in the share window as the chain_link icon like this. Click on it.
NOTE:
No matter how you share a file the recipeient(s) will still be able to choose the file format options and size to download.
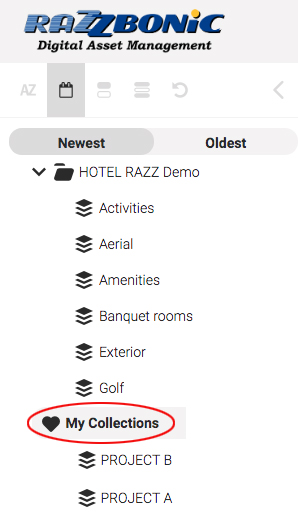
My Collections allow you to create your own personal albums with your favorite files. Think of My Collection as your own personal space to pull together media files for your next project. After selecting a file, click the heart icon in the bottom left corner to add it to a My Collections You can create and view your Collections folders through the Library Bar on the left side.
If images are not downloading, make sure to enable Pop-ups on your browser this will allow zip folders to be downloaded.
Files can be downloaded by clicking on the download icon in the thumbnail. To download multiple files, select the files you wish to download by clicking the checkmark in their thumbnails.
After selecting the files, click the download icon in the upper right corner.
On Google Chrome, look above at the far right of the search bar for a pop up icon and select 'always allow':
On MozillaFirefox, look above at the yellow preference bar and select 'allow pop -ups':
On Safari, click on Safari --> Preferences --> Privacy and then select 'Allow current website only':
For all other Internet browsers, you will have to undergo a similar process to allow zip folders to be downloaded.
Print a contact sheet
To download a contact sheet for a folder or album, navigate to the information page for that folder or album by choosing it in the folder tree and selecting the "View Detail Information" button (lower left corner)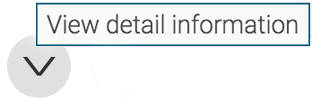
To download a printable PDF contact sheet with specific or multiple media select them by adding them to your.
Go to the category folder tree, bottom left and select the MY COLLECTION. Click on the new Collection that you just made.

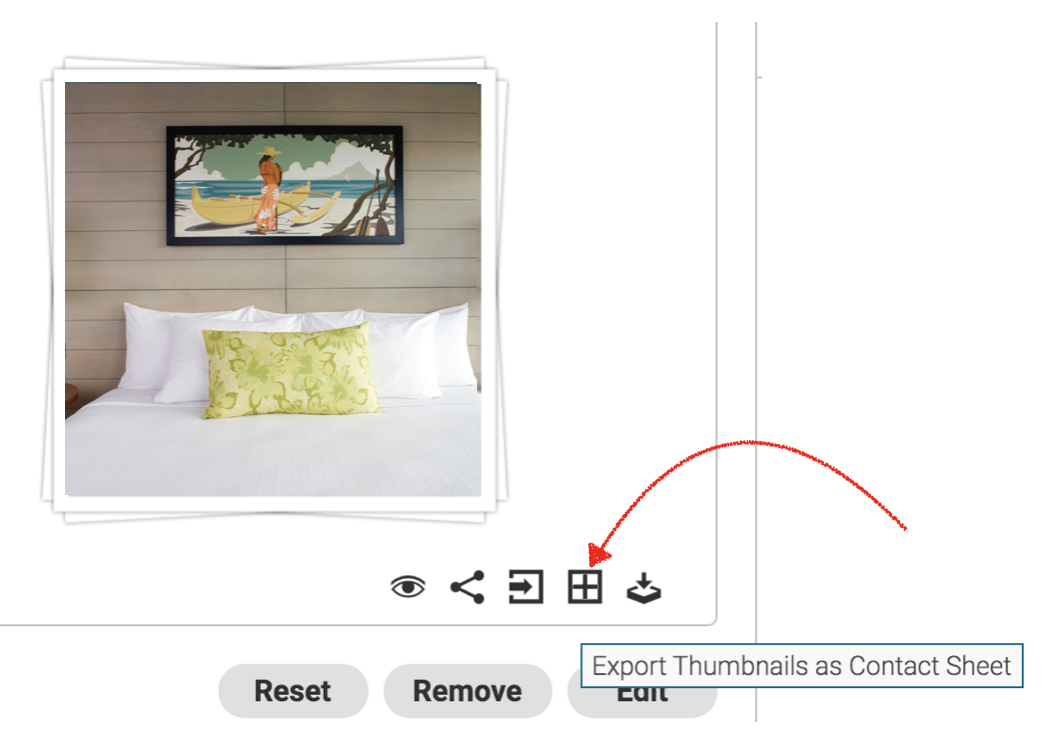
Then, select the "Export Thumbnails as Contact Sheet" button.

Export Contact Sheet with Metadata
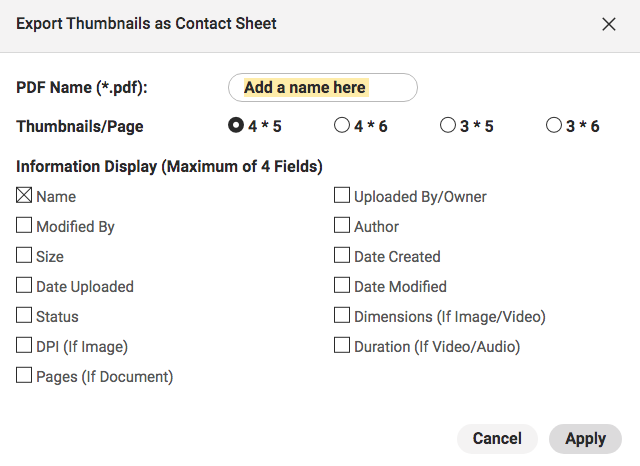
Next, you will have the option of the PDF name and the amount of image thumbnails per page.
After selecting from these options, select the Apply button
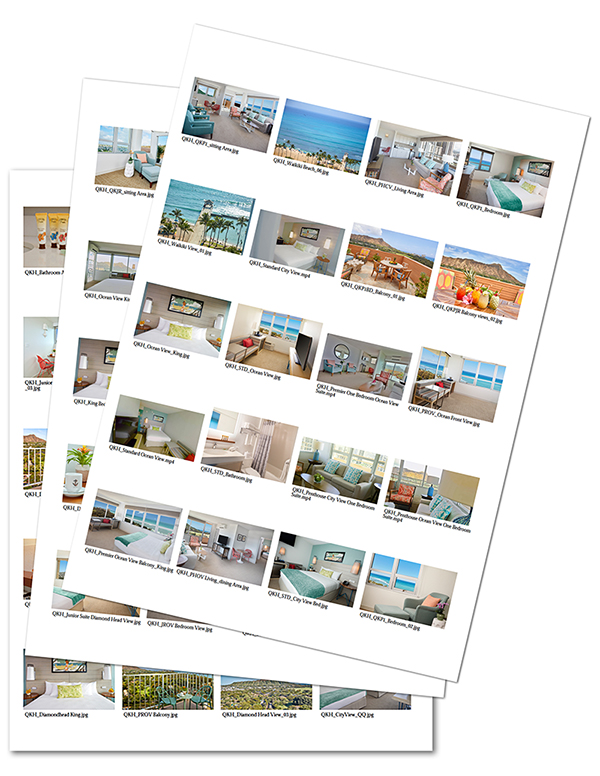
You will receive an email from noreply@canto.com with the link to download once the PDF file is generated. This Contact Sheet PDF file will be automatically removed in 7 days.
Registration and Logging In
Q. What is a Invitation code?The Invitation Code allows you to register and access one of Razzbonicʻs clients specific online media libraries. When your Media Library Administrator ( Razzbonicʻs client) creates the login they associate certain permissions or rights for you to enter a particular media library. In order for you to register and receive these permissions you need their Invitation Code. Chosen specifically for you. Please contact your Media Library Administrator directly for this information.
Q. Where do I get the Invitation Code?Each one of Razzbonic's clients has a Media Library Administrator. This person is solely responsible for giving you the Invitation Code to access their own media library.
Q. Who is my Media Library Administrator?The Media Library Administrator is the person who is responsible for giving you permission to access their online media library. Razzbonic manages the online media libraries of many different companies. If you need to contact a particular Media Library Administrator, you will need to know what company they are with. Razzbonic will then introduce you to that person. Only they can send you the required Invitation Code to access their online media library. If you have questions, please contact us via our Contact Page.
Q. How do I register?Your Media Library Administrator ( Razzbonicʻs client) will send you their specifc Registration URL(web address) and the Invitation code.
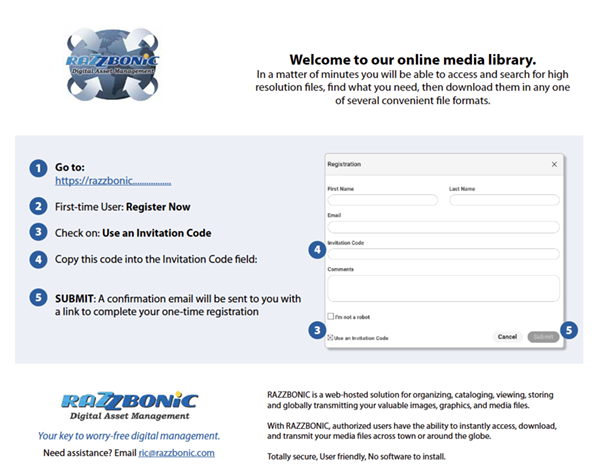
Like this.
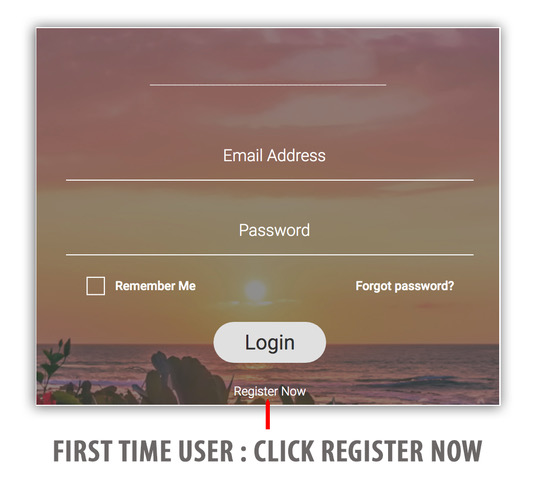
1) Go to the URL and login screen
2) First time User : Click Register Now
3) Copy and paste the Invitation code, then click [x] Use an Invitation Code.
4) Complete the form. Please check your inbox (or junk folder) for an email with instructions to complete your registration. The email will be from noreply@canto.com
- An account has been created for you and is ready for use with access to your new online media library:
- Your user ID will be YOUR email
- Now create a private password by clicking on the link provided. From now on you will only use your email and private password to access the online media library.
Q. I did not receive the email with the request to confirm my Registration
Please check your junk mail or spam filter. The email will be from noreply@canto.com. Need help? Contact support@razzbonic.com.
Q. I have changed my email address or have entered my email incorrectly. Your user’s profile will be displayed by clicking Profile from the User Menu.
User ProfileFrom here, you can edit your personal details including your display name, password, sign in status, and profile photo. Click Save to save any changes.
Searching and Selecting
The simplest form of searching for records is by double-clicking on the drop down Category tree on the left side. This quickly finds all of the records that are associated with that category and will show you how many files are found.
The search bar is available to use on any page in the main interface.
It is located in the upper-right corner of your screen.
To use the search bar, click the search field and type anything related to the media library files.
Press Enter to execute the search. The search bar accepts up to 80 characters.

A normal search will be a global search, anything in the files that is related to what was searched will be displayed. This can be titles, tags, keywords, Product IDs, dimensions, dates, folders, albums, etc.
Using the search function, you can perform a quick search which is a contain search in the records field. Search by Category or Record name
Click on the thumbnail to see a larger view with all of the *meta data that you or your graphic designer could ever ask for.
*Metadata is simply data about data. It means it is a description and context of the data. It helps to organize, find and understand data. i.e name, file format,dates,categories,color mode,color model pixels and resolutions.
Razzbonicʻs advanced search options gives you the ability to dive even deeper into your searches to locate specific media files.
The advanced search menu is divided into three sections:
1. Search: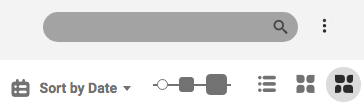
You can decide to do a global search (the default search) or search exclusively within the currently posted results.
2. Combine terms: A *boolean-style search for files.*A system of logic based on two possible values: true or false. The Razzbonic Advanced Search uses the Boolean operators "and" and "or" to combine search conditions.
The robust combined terms search tool has capacities to look for more dedicated, refined selections:
NOTE:
Using a space ( ), a comma (,), or a semicolon (;) will all work to separate terms.
- Select AND (the default setting) to search for files with all of the words in the text field. eg. lettuce; tomato; carrot
- Entering multiple search terms with separation will yield a result fielding all files that match exactly the search term. eg. Searching for Honolulu will generate results that shows exactly the words “Honolulu”
- Using the minus sign to designate the purposeful absence of a term you would like to exclude.
- For example, if you'd like to search for files containing "apple" but not "orange," you would enter into the search bar apple, -orange.
- Select OR to search for files that include at least one of the typed words.
- Entering multiple search terms with separation will yield a result fielding all files that match at least a part of the search term. eg. Searching for Big Island will generate results that have both the words 'Big' and 'Island.'
- Since the OR search tool allows you to search multiple files, you can search for many terms at once. Type in your search terms that you would like included into the search, and the results will yield all files that match with one of the terms you've entered. eg. 101, 102, 103, 125, 387, 815
- - The Wildcard Search lets you search for a term with only approximate knowledge of its file name by using an asterisk * before or after the term.
- For example, you know that a file has the word pineapple in it, but is unsure of what comes before or after it. Entering *pineapple or pineapple* will yield results for all files that include the word, regardless of what comes before or after the term. The setting can be either AND or OR.
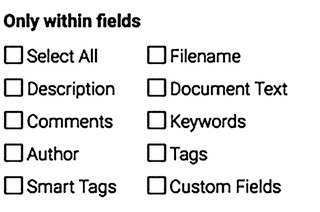
This option is for users who want a specific search within certain fields. You may narrow your searches even further by checking these boxes
The fields that can be searched are Description, Keywords, Tags, Custom Fields, Filename, Comments, Author, and Smart Tags. You can choose to search in one field, multiple fields, or click Select All to search in all eight fields.
Keywords make it so much easier to search for and find specific media files.
My Selection
How to temporarily save files into My Selections
Learn how to gather files into a temporary "My Selections" area for quick reference while working in Razzbonic.
When you would like to bulk select multiple assets from multiple albums, this is possible using My Selections.
While bulk selecting assets from a location, click the 'Remember Selection' icon:

Once you have completed your selection you will find your My Selection on the lower left side of your screen.
When you have all the files that you need you can then simply click on the Share or Download icon.
To make your selection more permanent save them to MY Collection.
To remove assets from My Selections, select the files and click remove.

Share
You can choose to send your selected files in two convenient ways.
Files can be shared by Email.
First select the file or files that you wish to share.
You can access the share window by clicking the Share button.
Click the email icon in the share window.
Enter one or many email addresses seperated by “,”, an expiration date (if desired), and your email message.
You can also toggle the option for Advanced Download features for the recipient, which allows for them to zoom, crop, and change the size of the image.
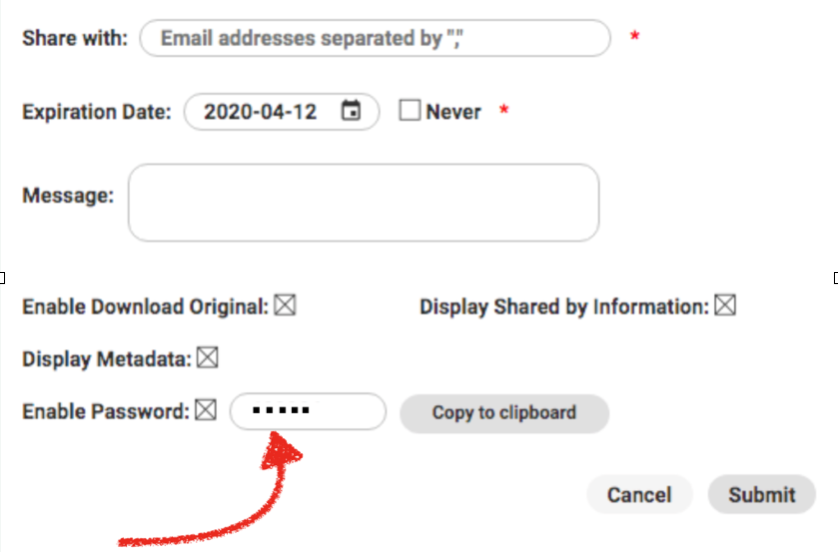
Another option that you have is to require a Password or Not? This might be dependent on to whom you are sending the files to. Click copy to clipboard.
Some people add their own email so that they have a copy of what they sent.
Click Submit to send the email
Files can be shared via a Link
To share files with external users without using email, use a Link. First select the file or files that you wish to share. You can access the share window by clicking the Share button.
The link option appears in the share window as the chain-link icon like this.
Click on it.
You'll be asked to provide an Expiration Date. Or click [ ] Never*
Additionally, you can enter more details when creating a link.
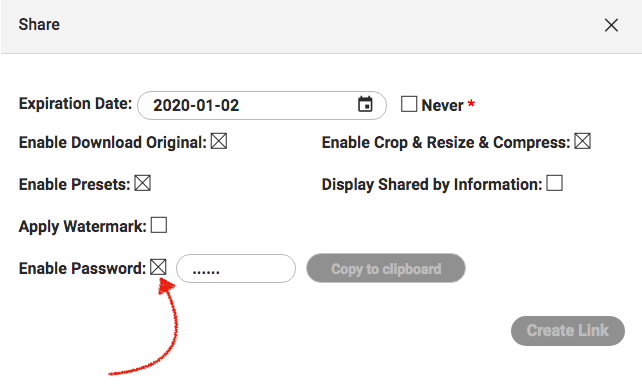
Another option that you have is to require a Password or Not? This might be dependent on to whom you are sending the files to. Your call.Click copy to clipboard.
Click Create link and add the link and the password (if you selected that option) to your own personal email.
My Collection
Save a Collection of specific files to allow others to view, use or comment on. Or for you to use in the future. With one click you can easily Add All to The Collection which will expedite your collection and delivery of files.
My Collection is a fast and semi-temporary holding place for you to use until you finalize your selection of images.
My Collection is a perfect collaborative tool since you can save and share this collection with the option that you would like.
Collections allow you to create your own personal albums with your favorite files.
Think of My Collection as your own personal space to pull together media files for your next project.
After selecting a file, click the heart icon in the bottom left corner to add it to a My Collections folder.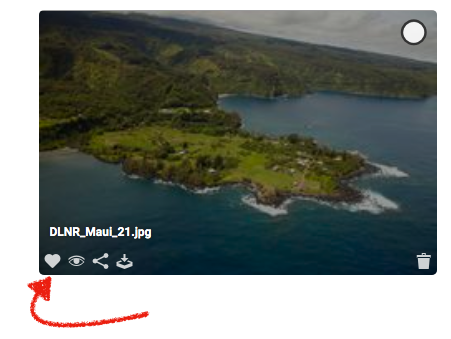
You can create and view your Collections folders through the Library Bar on the left side.
To select your My Collections folder to view or edit the assets inside, click on the folder and hit the Submit button.
My Collection is also perfect way to print a contact sheet of your specific files.